Showing posts with label cards. Show all posts

Tuesday, 15 October 2013

Birthday Candle Cards

It was my sister's birthday last month, and my mom's birthday last week.  I wanted to make cards for them both.  So I did what I always do when I'm seeking inspiration - visited Pinterest! 

I saw a card with a birthday candle on it.  The style of the card wasn't really 'me', but it gave me an idea. And here's what I came up with.....


For my SISTER:


And for my MOM:


I got to use buttons, pretty papers, ribbons, and my letter stamps - so many of my FAVOURITE things..... to make birthday cards for my two FAVOURITE ladies!!!

Carly

x


Thursday, 3 October 2013

Three Handmade Baby Cards

One of my crafty resolutions for 2013 was to make more (and buy less) greetings cards.  So far, I’ve made a wedding card, an engagement card, an anniversary card, a Fathers’ Day card, a Mothers’ Day card, several birthday cards and (dare I mention the ‘C’ word yet).....  a fair few Christmas cards.  

I’ve also made some baby cards – 3 to be exact!  And all for the same baby!!!  As you may have guessed from the photos in my post about the blanket I made for our best friends’ baby (you can see it here if you missed it), they chose not to find out whether they were going to have a boy or a girl.  So, in preparation for either eventuality (and an ‘extra’ one for added choice when the time came), I made 3 cards.....


In the end, when I found out that the baby was a girl, I plumped for the pink one of course!

Which is your favourite?

Carly


x


Tuesday, 23 July 2013

Engagement Card

When I was at school, I had a friend called Kate.  She was my best mate all through secondary school, and we got up to plenty of mischief (and giggles) together.  A few years after we moved to Germany, Kate moved to Australia.  And we hadn’t seen each other since then.  BUT (along with her Aussie boyfriend), she paid a visit to her parents in the UK a few weeks ago, and decided to combine this with a little tour of Europe – including Düsseldorf.  Yippeeeee!!!

We had SUCH a fun weekend together!  It felt like we were 16 again – and, as it happens, we’re both still just as silly high spirited as we were back then.  Unfortunately, we were so excited about our get-together that we completely forgot to take any photos of our adventures (otherwise I would have shared some with you).

Just before they came to stay with us, Kate’s boyfriend proposed to her (all romantic and proper – in Paris).  A great opportunity for a bit more card-making!  This time, I got the buttons out.  And here’s what I did with them.....


I was really pleased with how it turned out, and I think I see more card-making in my crafty crystal ball!

If you’re after ideas for handmade cards, by the way, Pinterest has heaps!!!  Is it just me, or does anyone else believe that Pinterest was invented solely to sneakily steal away hours upon hours of our time without us realising it?!?  Once I get started on there, Simon has to prise the laptop out of my hands by force when my eyes start to turn square!

Off to Pinterest now, then.....

Carly

x  

Sunday, 16 June 2013

Handmade Fathers' Day Card

Happy (British) Fathers' Day to all the Dads out there!  And an extra-special happy Fathers' Day to the best dad of them all - mine (of course..... well, I think so)!

I've been really good so far this year in working on my aim of making more (and buying less) greetings cards.  But, so far, I haven't made any cards for men.  Making for men is difficult, don't you think?

So, I decided to challenge myself to make a Father's Day card.  And here's what I came up with.....


I hope he's going to like it.....

And, because I know he reads this (that's how brilliant a dad he is)......

HAVE A GREAT DAY, DAD!!!  LOVE YOU!!!

Carly

x

Saturday, 25 May 2013

A Birthday Present for a Kniting Friend

Last week, a good friend of ours turned 40.  I'd bought a couple of little gifts to package up for her, but I wanted to MAKE her something too.  While browsing on Ravelry, I found just the the thing to knit for a friend who knits - a teeny, tiny sweater-in-progress brooch.....


..... knitted on a pair of snapped-in-half toothpicks!!!

I found the pattern here.

Of course, I had to make her a card too.  And I couldn't resist making ANOTHER paper and buttons bunting card.....


..... just in a different colour (you can see the red - ruby wedding - version here).

Happy birthday, dear Saffron, happy birthday to you!!!  

Carly

x

Sunday, 21 April 2013

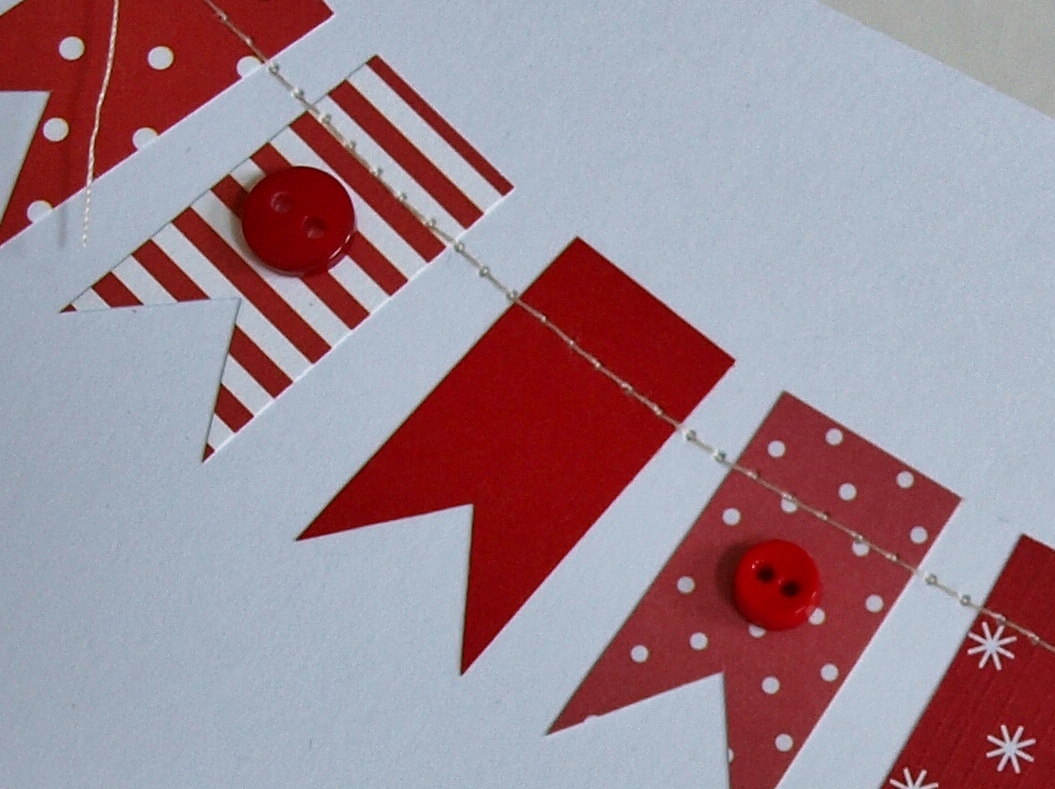
Bunting and Buttons Card


Today’s my parents’ 40th (ruby) wedding anniversary. 

CONGRATULATIONS, Mom and Dad!  I hope you’re having a wonderful day!!!  xxx

I wanted to make them a special card, but couldn’t decide what to put on it.  Lots of the ideas I found while searching the internet were a bit old-fashioned – and not really my mom and dad!  My mom had said that she really loved the Mothers’ Day ‘bunting’ card I’d sent her (you can see it here if you missed that post).  So, I decided to do something similar.  Then on good-old Pinterest, I found a card with paper bunting SEWN on (here).  I LOVED it, and decided to do something similar, but with ruby-red flags and......  buttons!!!

Here it is:


I loved sewing on to the card.  I thought it’d be tricky, and the card might get marked or dented from my sewing machine.  But it was actually really easy, and worked really well.  I love how the little stitches looked – and think it gave the card more interest and texture.  It’s definitely a technique I’ll be using on cards again in the future!

Happy Sunday, dear friends!

Happy anniversary, Mom and Dad!

Carly

x


Sunday, 31 March 2013

More Easter Makes

Thank you for all of your sweet comments on my Bunny Bunting tutorial!  You can find it here if you missed it.  Now I'm back again, to show you a few more of my Easter makes.....

I made this sweet little crocheted Easter Bunny for my sister:  


I love his long, floppy ears and bright shiny eyes.  I found the pattern on Ravelry, here. 

As my sister's now caught the sewing bug from me, I thought I'd wrap her little Easter gift in fabric and ribbon - that she can use in a future project, maybe:


I liked how my little parcel looked, and think I might try wrapping some future pressies in fabric, too.

I just want to show you one more thing before I go.  Here's one of the Easter cards I made with my class:


They were so easy to do - just a hand print in black paint, a googly eye, and some fluffy cotton wool balls.  WARNING:  it is entirely impossible for a teacher's clothes to remain clean amongst an entire class of 4-year-olds with their hands painted black (no matter how hard that teacher may try to dodge the little darlings until all hands have been thoroughly washed).    

I hope that the Easter Bunny managed to find you this morning, and that you've now got chocolate enough to last you until August (and if not, Christmas)!  HAPPY EASTER to all of you, my dear friends!!!  

Carly

x
    

Sunday, 10 March 2013

Mothers' Day Crafting

Happy (British) Mothers' Day to all the moms out there!  And, most of all, happy Mothers' Day to MY WONDERFUL MOM!!!

Here's the card I made for my mom, with some teeny-tiny little paper triangles, a black pen, and a set of alphabet stamps:


And here's the present I made for her.  It's the purse from the lovely Cath Kidston 'Stitch' book, and my first ever attempt at cross-stitch:


We're going to have a good, long Skype session later on.  I wish it could be a real-life chat, though!  But..... we don't have to wait too long for that now, thank goodness!!!  :-)

I LOVE YOU, MOM!!!  

Carly

x

Wednesday, 30 January 2013

Better Late Than Never


Ooopsie!!!  It’s almost the end of January, and I haven’t made my new year’s resolutions yet.  I guess it’s not too late (as it’s still January).  And I’m sure a wise man once said “BETTER LATE THAN NEVER!”

Deciding to ONLY set fun, crafty resolutions last year was a brilliant idea – no worrying, no guilt, no disappointments, no shame, no stress! 

So, there’ll be no dull diet plans or excruciating exercise itineraries for me in 2013.....  just lots of crafty capers and arty adventures - AGAIN!!!

How did I do with last year’s resolutions?  Here’s a quick review:

1.  Learn to crochet. Well, I did!  I’m still just a newbie, but I’ve completed a few crochet projects now – and you can tell what they’re meant to be.  So, tick!
2.  Make more things for myself (including some clothes).  I’ve knitted myself a few bits and bobs to wear, and I’ve made myself some jewellery.  But I haven’t sewn myself any clothes (which was what I intended last January).  So, yes and no to this one.
3.  Make more (and hopefully buy less) greetings cards.  Tick!  I have made more cards (especially Christmas cards) and bought less. I could still do better, though.
4.  Have a go at knitting things that are not just sewn-up rectangles.  Yes!  I’ve knitted a few things using circular needles, and a few things that aren’t rectangles or squares.
5.  Experiment with making more home accessories.  Tick!  Lots of cushions, a few papercrafty things to hang on the wall, baby quilts, different kinds of Christmas decorations.....  I would have liked to have experimented with more new patterns and ideas, though.  
6.  Improve my photography skills.  I think I have.  I feel more confident in using my camera now.
7.  Post more tutorials on my blog.  Sadly, no.  Sorry!  I only posted one last year.  That’s shameful, I know!  Must do better!!! 

Bearing my review of 2012, and thinking of what else I’d like to achieve, I came up with my CRAFTY RESOLUTIONS FOR 2013:

1)  Post more tutorials on my blog!
2)  Make some clothes for myself (sewing).
3)  Learn to follow a proper crochet pattern.
4)  Make more greetings cards – for different occasions.
5)  Expand the range of things I make to sell (including adding more home accessories).
6)  Venture into the kitchen to do some baking.
7)  Try out some crafts that I’ve never tried before.

If you have any suggestions for number 7, I’d love to hear from you!


Let’s see how this year’s resolutions go.....

I’m off to make a start right now.....

Carly

x

P.S.  Who else is IN LOVE with their Mollie calendar?

Friday, 16 November 2012

Baby Card


Well, I haven’t been getting a lot of crafting done lately (see my last post for some of the reasons).  I have a few ongoing projects that I’ve been picking up and putting down, but they’re not ready for showing-and-telling yet.  And I’ve been working on a few Christmas pressies, but they’re top-secret!

So I thought I’d show you this baby card that I made for our next-door neighbours a few weeks ago.  I really want to make more cards.  I struggle to find ones I like in the shops – and the nice ones are so expensive!  So, for this occasion, I decided to make my own.  And here it is.....


What do you think? 

Once I managed to make a babygrow template that I was happy with, the rest was pretty simple.  I enjoyed adding the little trim-bits with cute spotty and checked papers.  And, of course, HAD to stick on a few buttons to finish it off!!!

I hope I'll be able to get a bit more crafting done over the weekend.....

Carly

x

Monday, 2 January 2012

New Year's Resolutions 2012


Firstly, I want to say “HAPPY NEW YEAR” to you all.  I hope you had a happy and fun Christmas, saw in 2012 in style, and have eaten as much as I have!!!

Because of my over-indulgence over the past week or so, I guess I should be starting my 'New Year’s Resolutions 2012' post with a promise to diet or do more exercise.  BUT that’s no fun, is it?  And we all know that we should NOT make promises that we can’t keep!  So, no more impossible-to-stick-to resolutions for me!!!  I’ve decided that this year’s resolutions will be fun, feasible and CRAFTY!!!

I’m hoping that, having written down this year’s pledges for the whole world to see, I’ll feel under some pressure to MAKE SURE I keep them.  Well, we’ll see how it goes.....


Here they are:

1)  Learn to crochet. 
2)  Make more things for myself (including some clothes).
3)  Make more (and hopefully buy less) greetings cards.
4)  Have a go at knitting things that are not just sewn-up rectangles.
5)  Experiment with making more home accessories.
6)  Improve my photography skills.
7)  Post more tutorials on my blog.

What are your crafty new year’s resolutions for 2012?

Carly

x

P.S.  My 2012 calendar (in the photos) is from www.ktwoproducts.com. They sell some really cute organisers, diaries, address books, etc.  AND they have a sale on at the moment!  ;-) 

Thursday, 22 December 2011

Easy-Peasy Fabric Scraps Christmas Card Tutorial

So, here I am, blogging from the UK!!!  At the moment, we're in Devon, staying with the in-laws. 


I apologise for this post being a little late - we have been super-busy (cleaning, tidying, entertaining, driving back to the UK, Christmas shopping, visiting relatives, and eating, Eating, EATING)!!!  BUT I'm sure you all understand (because you've probably been racing around like headless turkeys too).  

As soon as I could pinch a few minutes to myself, I'd planned to show you some photos of the Christmas cards I made earlier this month.  But, now that I have a bit of time, I've decided to tell you HOW I made them too.  They were very easy, and didn't take too long.  And the method I used could be applied to all sorts of simple christmassy designs - and to images to suit cards for any occasion!

Here are my finished cards:


Here's what you'll need to make them:
  • Some reasonably thick card (or pre-made blank cards)
  • Lots of fabric scraps
  • Some bond-a-web
  • Pens
  • Scissors
  • An iron and ironing board
  • A pressing cloth
And here's how to make them:

1.  Take your card, cut it to the size you want, and fold it in half (or cheat - as I did - and buy pre-made blank cards).
2.  Pull out a load of fabric scraps to use for the project, bearing in mind how you want the finished image to look.  Also, be careful to choose fabrics that aren't see-though for any bits that will be layered on top of other colours (you can see that I forgot about this 'rule' with the fabric I chose for my elves' faces). 
3.  Draw around each of your fabric scraps, on to bond-a-web.  Then cut out the shapes, just inside the lines you drew (so that the bond-a-web bits are slightly smaller than your fabric scraps).
4.  Put your iron on to a medium-heat setting (without steam).
5.  Place one of your fabric scraps face-down on your ironing board.  Then place your bond-a-web piece on top (making sure that the sticky side is touching your fabric and the papery side is facing up.  Then iron over the top of the bond-a-web until it is stuck to the fabric.  Repeat with each of your fabric scraps and bond-a-web pieces.  
6.  Now you need to draw and cut out the separate pieces for your design.  Big, simple shapes are easiest!
7.  Lay your pieces on to your card and move them around until you're happy with the design.  Take note of how the pieces overlap each other, and remember to stick them down accordingly.
8.  Take your first piece.  Pull the papery backing off the bond-a-web and lay the piece in place on your card.  Then take a pressing cloth, lay it over the top of your card, and iron over the whole thing until the fabric is stuck in place.  
9.  Do the same with all of your pieces, building up your design.  
10.  When all your fabric bits are stuck in place, you can add 'extras' with a pen (I used 'fineliner' pens to draw on the snowman's arms, the elves' faces and hair, and the snowflakes and stars).  
11.  Tadaaaaa - your card is finished!!!  Write it, pop it in an envelope, and post it off to someone you love.  

Give it a try!  It's lots of fun, and the possibilities are endless!  I'm already thinking up ideas for next year - a pile of pressies, perhaps - or a little gingerbread house with an icing roof - or some holly - or a Christmas pud.....  Any other ideas???

Anyway, before we get carried away planning for NEXT Christmas.....  I have good intentions (at the moment) to blog again before the big day - I'd like to show you all the pressies I've made!  BUT, just in case I can't squeeze another one in, I thought I'd better take this opportunity to wish you all a VERY merry Christmas!!!  I hope Santa brings you what you've wished for, and that you have a magical day!!!

Carly

x    

    
Related Posts Plugin for WordPress, Blogger...