
I’ve been ridiculously busy over the past few weeks, preparing for a Christmas ‘Open House’ party I’m going to be hosting on December 1st. I’ve been making lots of all my ‘usual’ thingies – bags and pouches and corsages. But, as it’s going to be a Christmassy do (with mulled wine and Christmassy nibbles, and carols, and my tree up VERY early indeed), I thought I should have a go at making some festive things to sell too. Coming up with ideas for cute decorations has been lots of fun! So far, I’ve made some little Christmassy houses and Christmas trees. Tomorrow, I’m going to have a go at making some mini stockings and (possibly) some little birdies.
The Christmas trees were super-easy to make, and looked really cute when they were finished. So, I thought I’d post a tutorial on how to make them.....

First, cut out 2 triangles of the fabric you want to use for the tree. These could be as big or as small as you like (so I haven’t included a template). Cut out one rectangle of the fabric you want to use for the tree trunk. This should be twice as long as you want the trunk to be, as you are going to fold it in half before attaching it to the base of the tree.

Now fold the rectangular piece in half (right sides facing), and sew up the sides.

Turn the trunk piece right-sides-out.

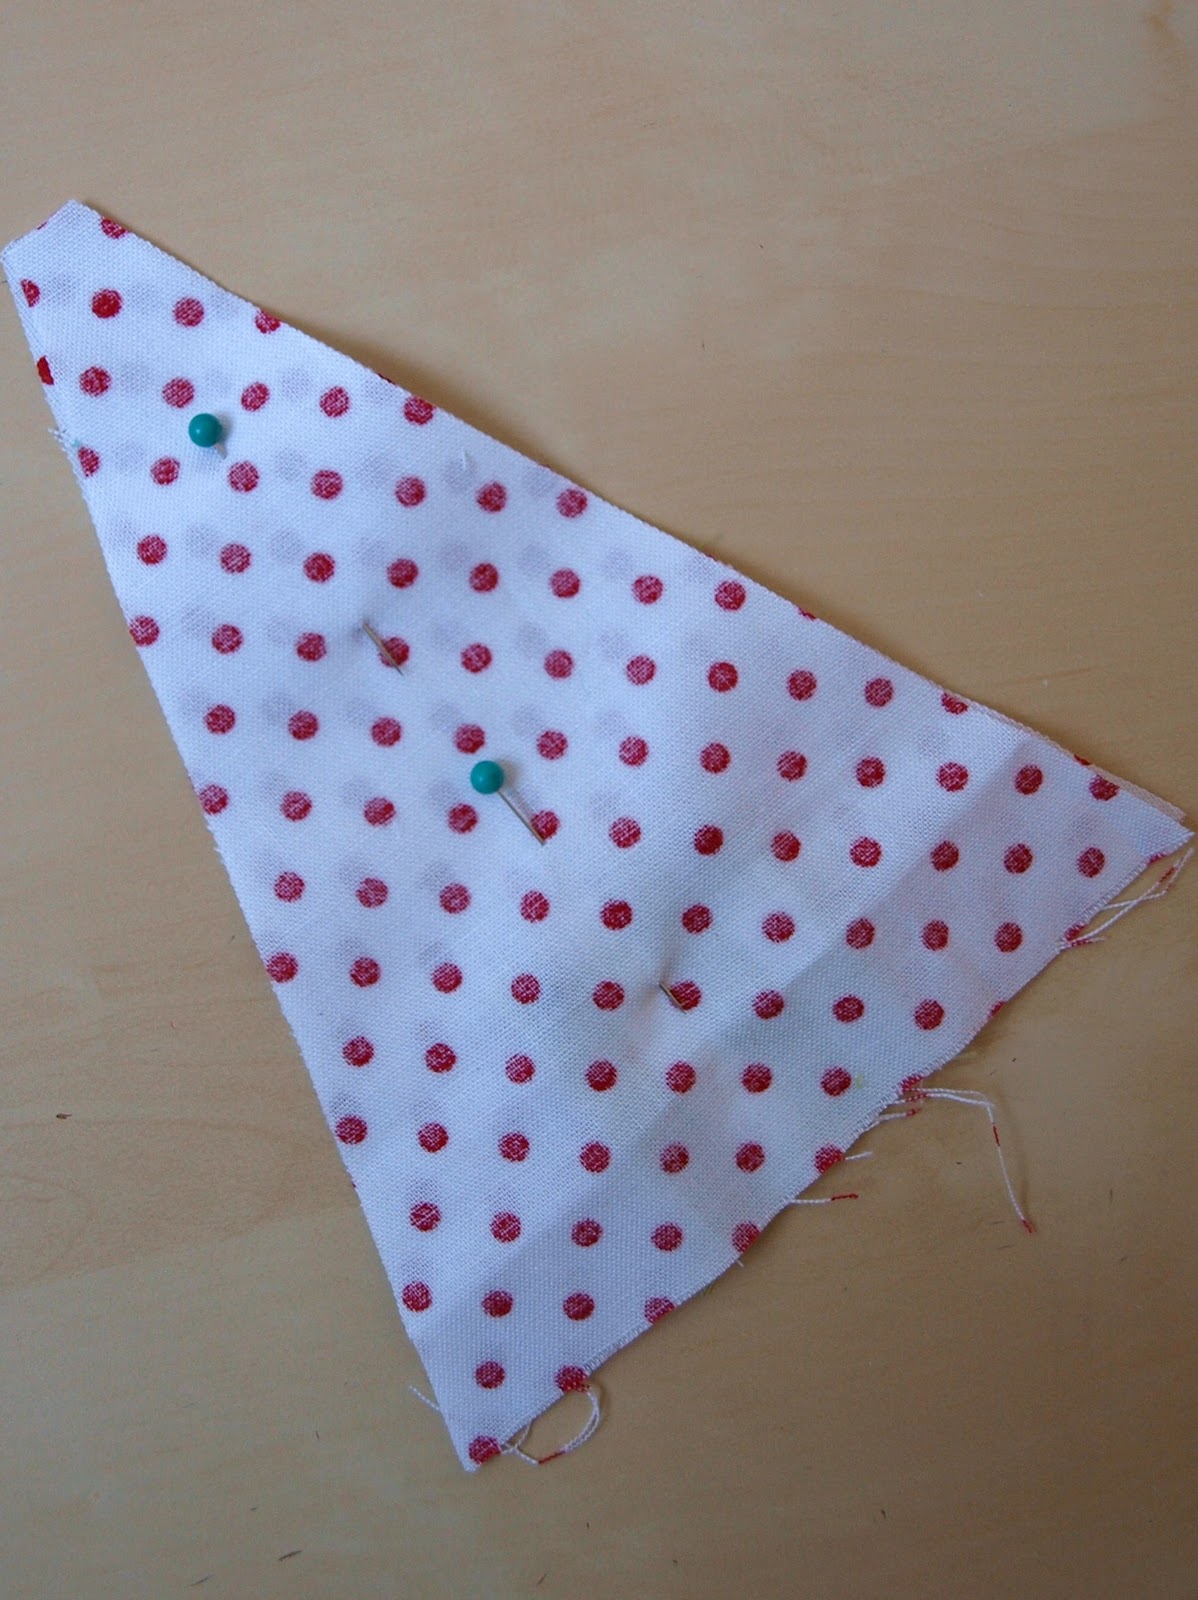
Place the trunk piece on the right side of one of the triangular pieces, with the open end level with the base of the triangle. Make sure it’s right in the middle. Then pin it in place.
Now place the second triangular piece on top of the first (right sides facing). Line up all the edges and pin in place.

Sew the pieces together, with a 1cm seam allowance. Leave a small gap for turning your tree right-sides-out.

Now you can turn your tree right-sides out. I used a chopstick to gently push out all the corners.

Fill the tree with stuffing. Again, I used my trusty chopstick – this time to poke the stuffing all the way into the corners of the tree.

When your tree is as firm as you’d like it to be, topstitch the little turning gap. Then use a needle to attach some string or embroidery thread to the top of the tree, so that you can hang it up. Now your tree’s finished - it’s as simple as that!
You could add some cute appliqué or buttons to your tree before sewing the pieces together, if you wanted it to have more detail. Or you could make lots of them (as I did) in different Christmassy shades. I think they’d look cute handing together somewhere! These ones are to sell at my ‘Open House’ party, but I’m going to have to make some more – just for me!!!

I’m finding it hard to take decent photos at the moment (because it’s still dark when we leave for work in the mornings, and dark again by the time we get home). But, when I get the chance, I’ll post some shots of other things I’ve been working on for the ‘Open House’.
Hope you’re all enjoying your Christmas crafting!
Carly
x
They're so cute! Love the christmassy fabrics x
ReplyDeleteThese trees are so pretty! Good luck with the Open House you will be hosting. Let us know how it went, ok?
ReplyDeleteGlad you like the little trees! I'm REALLY enjoying making lots of Christmassy bits and bobs for the Open House!!!
ReplyDeleteCarly
x
wonderful creations, delightful blog ;0)x now a follower x
ReplyDeleteI love these little trees. Thanks for the tutorial. Lovely blog.x
ReplyDeleteLove...
Emma xxx
Hello, thank you for sharing that tutorial. :0) I think I might make some of them, they are so cute!
ReplyDeleteLou xxx
Love the trees, the little forest of them looks gorgeous!
ReplyDeleteHello my wonderful new (and old) blog pals,
ReplyDeleteThank you for stopping by and leaving such lovely comments! Glad you like the trees! I'm going to try to put a few more tutorials on the blog soon.....
Carly
x
gorgeous blog you have, great ideas. Thanks for popping over to mine x
ReplyDeleteThese are sooooo cute!!!! Thanks for sharing the tutorial, I may just have to get over my sewing/fabric anxieties to try them!!
ReplyDeleteyour tress are lovely, hope your open house is a success!x
ReplyDeleteAm book-marking this!- what a cute and easy project!
ReplyDeleteThanks for sharing.
Hope your open house makes are going well.
Xx
How adorable are these! I love them. Wishing you a happy Thanksgiving Carly.
ReplyDeleteP.S. Look for beginner crochet lessons on Tangled Happy in 2012. :)
Hello Carly,
ReplyDeleteThank you for your lovely comment. The people I've met in blogland are really lovely. And I'm going to try to make some little trees. It's nice to have homemade christmas decorations, thanks for sharing.
Love ...
Emma xxx
Oooh! What a lot of lovely comments! Thank you so much, my lovely bloggy friends!
ReplyDelete:-)
Carly
x
What a fab tutorial, thank you so much for posting!! It is SO cute :)
ReplyDeleteThank you for your kind comments on my blog also! Hope you have a super weekend!
Louise xx
Hello, the paper chains are from Laura Ashley! :0) xxx
ReplyDeleteHi Louise,
ReplyDeleteThanks for stopping by and commenting! I'm very relieved to have so many nice comments about my tutorial (as it was my first one, and I wasn't sure how well it would go)!
Carly
x
They are really cute and look really good all together. I wouldn't mind having a go. xxx
ReplyDelete